1. Performance Boost
At the heart of the Raspberry Pi 4 is a powerful quad-core ARM Cortex-A72 processor, providing a substantial performance boost compared to its predecessors.
With clock speeds of up to 1.5GHz, this tiny computer can handle a diverse range of tasks, from basic computing to more resource-intensive applications.
2. Enhanced Multimedia Experience
The Raspberry Pi 4 supports dual 4K displays, making it an ideal choice for multimedia projects.
Its VideoCore VI graphics processor ensures smooth playback of high-definition videos and a more immersive visual experience.
Whether you’re building a media center or a digital signage system, the Raspberry Pi 4’s multimedia capabilities are truly impressive.
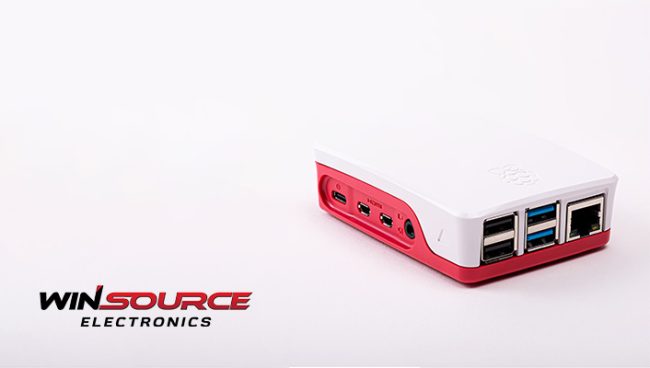
3. Connectivity Options
Connectivity is a strong suit of the Raspberry Pi 4.
It boasts two USB 3.0 ports, two USB 2.0 ports, and Gigabit Ethernet, providing ample options for connecting peripherals and accessing high-speed networks.
Additionally, integrated wireless LAN and Bluetooth support offer further flexibility in terms of connectivity.
4. Versatility in Applications
From DIY projects to educational initiatives, the Raspberry Pi 4’s versatility knows no bounds.
It serves as an excellent platform for learning programming and electronics, thanks to its GPIO pins that allow users to interface with sensors, LEDs, and other hardware components.
Also, its compatibility with a wide range of operating systems, including Raspbian, Ubuntu, and others, makes it adaptable to various applications.
5. Home Automation and the Internet of Things (IoT)
The Raspberry Pi 4 plays a pivotal role in the realm of home automation and IoT.
Its compact size and low power consumption make it an ideal choice for creating smart home devices and monitoring systems.
Whether you want to build a weather station or automate your home lighting, the Raspberry Pi 4 provides the necessary computing power in a small, energy-efficient package.
6. Community and Support
One of the key strengths of the Raspberry Pi ecosystem is its vibrant community.
From online forums to extensive documentation, users have access to a wealth of resources.
This active community fosters collaboration, knowledge-sharing, and innovation, ensuring that users of all skill levels can harness the full potential of their Raspberry Pi 4.
How is the Raspberry Pi 4 created?
So how is the super teeny but mighty electronic device created?
Read on to discover how!
The Raspberry Pi 4 is manufactured through a series of processes involving the assembly of various components onto a printed circuit board (PCB).
Here is an overview of the key steps in the manufacturing of the Raspberry Pi 4:
- Design and Prototyping: The process begins with the design of the Raspberry Pi 4. Engineers create a detailed schematic specifying the layout of components on the PCB. Prototypes are then produced and thoroughly tested to ensure functionality and reliability.
- PCB Fabrication: The design is translated into a physical PCB through a fabrication process. This involves etching copper layers onto a substrate, typically made of fiberglass-reinforced epoxy. The PCB serves as the foundation for mounting the various electronic components.
- Component Acquisition: The electronic components required for the Raspberry Pi 4, such as the CPU, memory chips, connectors, and other integrated circuits, are sourced from different suppliers. The Raspberry Pi Foundation works with manufacturers to secure high-quality components for assembly.
- Surface Mount Technology (SMT) Assembly: Surface mount technology is employed to attach the electronic components to the PCB. Automated machinery places the tiny components precisely on the board, and solder paste is applied. The assembly then goes through a reflow oven, where the solder is melted, securing the components in place.
- Through-hole Assembly: Certain components, like connectors and larger components, may be mounted through holes in the PCB using through-hole assembly techniques. This involves manually or robotically inserting the component leads through holes in the PCB and soldering them on the other side.
- Quality Control and Testing: Once the components are mounted, the Raspberry Pi 4 undergoes rigorous quality control and testing. This includes functional tests to ensure that all components are working correctly. Random samples may undergo more extensive testing to validate overall reliability.
- Programming and Initialization: The Raspberry Pi 4 requires firmware to operate. During the manufacturing process, the device is programmed with the necessary firmware and initialized to ensure it can boot up and function properly.
- Final Assembly: After testing and programming, any remaining components, such as heatsinks or connectors, are added to the Raspberry Pi 4. The final assembly may also include the placement of labels and protective coatings to enhance durability.
Unleashing the Power of Raspberry Pi 4 – To End On…
As we’ve found out today, the Raspberry Pi 4 stands as a testament to the incredible possibilities that arise when powerful computing meets compact design.
Whether you’re a hobbyist experimenting with electronics, an educator inspiring the next generation of innovators, or a professional building a custom solution, the Raspberry Pi 4 is a remarkable tool that continues to redefine the boundaries of what’s possible in the world of electronics.
For all your Raspberry Pi 4 needs, either download our full brochure or head over to our store.
Also don’t forget to check our blog page regularly for more product information and updates.
© 2025 Win Source Electronics. All rights reserved. This content is protected by copyright and may not be reproduced, distributed, transmitted, cached or otherwise used, except with the prior written permission of Win Source Electronics.
COMMENTS