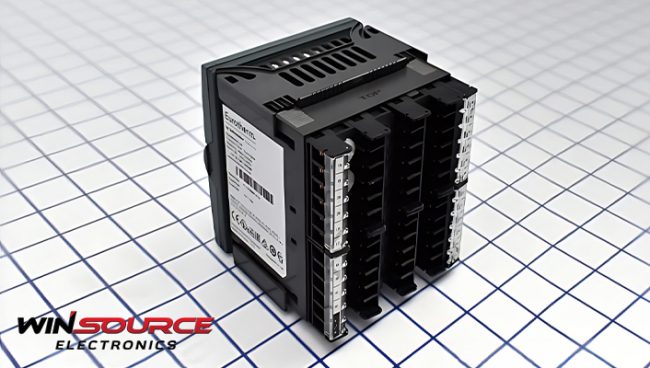
PID Controller stands out as a versatile and powerful tool. Whether you’re dealing with a Single 8 Segment Programmer, ¼ Din size, or working within the 85-264 Vac Supply Voltage range, this controller’s capabilities are vast. In this step-by-step guide, we’ll learn how to tune this controller for optimal performance.
Table of Contents
ToggleGetting to Know the Basics
The first step in mastering the 3204/CP XXX controller is grasping the fundamental principles of PID (Proportional-Integral-Derivative) control. This control strategy aims to maintain a process variable (PV) at a desired setpoint (SP) by adjusting the output. The three components – Proportional, Integral, and Derivative – work together to achieve a stable and responsive control system.
Proportional (P): The P component responds to the current error, which is the difference between the setpoint and the process variable. A higher P value results in a more aggressive response to changes in the error.
Integral (I): The I component addresses accumulated past errors over time. It eliminates any long-term offset between the setpoint and process variable. Increasing the I value enhances the controller’s ability to eliminate steady-state errors.
Derivative (D): The D component anticipates future errors by examining the rate of change of the error. A higher D value provides a faster response to rapid changes, preventing overshooting.
Steps to Tune the 3204/CP XXX Controller
Step 1: Accessing Controller Parameters
To begin the tuning process, access the parameters of the 3204/CP XXX controller. Familiarize yourself with the specific settings for your Single 8 Segment Programmer, ¼ Din configuration, and the 85-264 Vac Supply Voltage range. These initial steps lay the foundation for a successful tuning procedure.
Step 2: Setting the Initial Parameters
Adjust the proportional, integral, and derivative gains to conservative values. Start with a low P value and gradually increase it until the system exhibits slight oscillations. Then, fine-tune the I and D values for stability.
Step 3: Analyzing the System Response
Execute a step test by introducing a setpoint change and observing the system’s response. Analyze the transient behavior, looking for overshoot, settling time, and stability. Make note of the time it takes for the system to reach a steady state.
Step 4: Refining the Proportional Gain
Based on the system’s response, refine the proportional gain (P). If overshoot is excessive, reduce the P value. Conversely, if the response is sluggish, increase P. Aim for a balance that minimizes overshoot while maintaining a responsive system.
Step 5: Adjusting the Integral Gain
Next, focus on the integral gain (I). Fine-tune I to eliminate any steady-state error. If the system tends to settle below the setpoint, increase I; if it overshoots, decrease I. Strive for a compromise that achieves a minimal settling time without introducing excessive oscillations.
Step 6: Fine-Tuning the Derivative Gain
Lastly, address the derivative gain (D). Use D to mitigate overshoot and enhance stability. If the system exhibits oscillations, increase D; if it responds sluggishly, decrease D. Aim for a smooth and controlled response without introducing undue fluctuations.
Step 7: Iterative Optimization
Tuning a PID controller is an iterative process. Repeat steps 3 to 6 until the system response aligns with the desired performance. Each iteration brings you closer to an optimized control system.
Step 8: Validating the Tuning
After achieving satisfactory tuning, validate the controller’s performance under various operating conditions. Test the system’s response to disturbances and changes in setpoints. Ensure the controller adapts quickly and effectively to maintain stability and accuracy.
The Role of CP XXX in Tuning
Throughout the tuning process, the importance of the CP XXX controller becomes evident. Its versatile capabilities, coupled with the Single 8 Segment Programmer, ¼ Din size, and 85-264 Vac Supply Voltage range, provide a robust platform for precise control in diverse applications.
The CP XXX controller’s Output Options: Relay/Relay/Relay, along with the absence of a Comms Option, underscore its reliability and simplicity. This configuration is ideal for applications where communication interfaces are not required, emphasizing the controller’s focus on efficient and straightforward control.
Conclusion
Mastering the tuning of the 3204/CP XXX Single Loop PID Controller is a crucial step in achieving optimal control in diverse industrial settings. The step-by-step guide provided insights into the PID control strategy, emphasizing the unique features of the CP XXX controller
In your pursuit of efficient and reliable control, the iterative optimization of the proportional, integral, and derivative gains will unlock the full potential of the CP XXX controller. This simple yet powerful device, with its absence of a Comms Option, is tailored for applications where straightforward and dependable control is paramount.
As you navigate the tuning process, consider the significance of WIN SOURCE as a reliable distributor for obtaining essential components. Our commitment to quality and extensive inventory complements the capabilities of the CP XXX controller, ensuring a seamless integration of advanced control systems.

COMMENTS